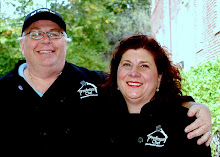
We began to plan our brick oven in October of 2007. Phil did lots of research on the Internet and read books on the subject. After much negotiating with me I finally gave him the green light to proceed, still not convinced that this was at all possible.
Phil had worked as a professional chef for many years, one of the restaurants he spent time in was Addesso on Providence's East Side. This famous eatery had one of the first wood fired brick ovens in the area.
Most of the brick we used came from my efforts of scanning Craigslist.com for used brick as luck would have it I found someone who had just knocked down his indoor fireplace and chimney. We took home 2 pickup truck loads of both red brick for the outside of the oven and fire brick for the interior. The fire brick is needed due to the intense heat generated by the wood burning inside.
We began to dig the additional patio extension the second week of April. Poured a 12 in thick foundation for the oven by the 1st week in May, and began to lay cinder block and brick shortly after that. We went through truck loads of sand, bags of regular cement, a few bags of refractory cement (high heat resistant), lots of lime, water and most of all sweat. By the end of June we were lighting curing fires, you need to SLOWLY cure the cement with small fires building up to the inferno type fires that you need to cook a pizza in 3-5 minutes! The small fires dry out the cement without cracking it; if you crack the cement you will lose heat!!
So we had our first official pizza party July 4th 2008, and have not stopped using the oven since.
Click on the photo below to see the photo diary.
 |
| The Red Dragon Cafe |


Awesome! Your red brick oven is just wonderful! And so are your pizzas!!!
ReplyDeleteI'm always searching for the perfect pizza crust recipe. Could you share your recipe? My email is wyomingmom@mac.com
Here in northern Wyoming... if you love pizza... you must make it at home or buy a frozen one.
I love this brick oven! Looking at the gallery you provided, I can see the effort you guys applied to make this brick oven project a success. Kudos! By the way, is this still in use? :)
ReplyDelete- Nohemi Tutterrow